
Binance Exchange Account Registration and Trading Full Graphic Guide
Want to enter the cryptocurrency market but don't know how to do it? This article provides you with a detailed guide to opening an account and basic u…
Today, we will bring a nanny levelBinance exchange registration and trading operation guide to the majority of cryptocurrency beginners. The detailed steps are as follows. You can easily get started by following the instructions:
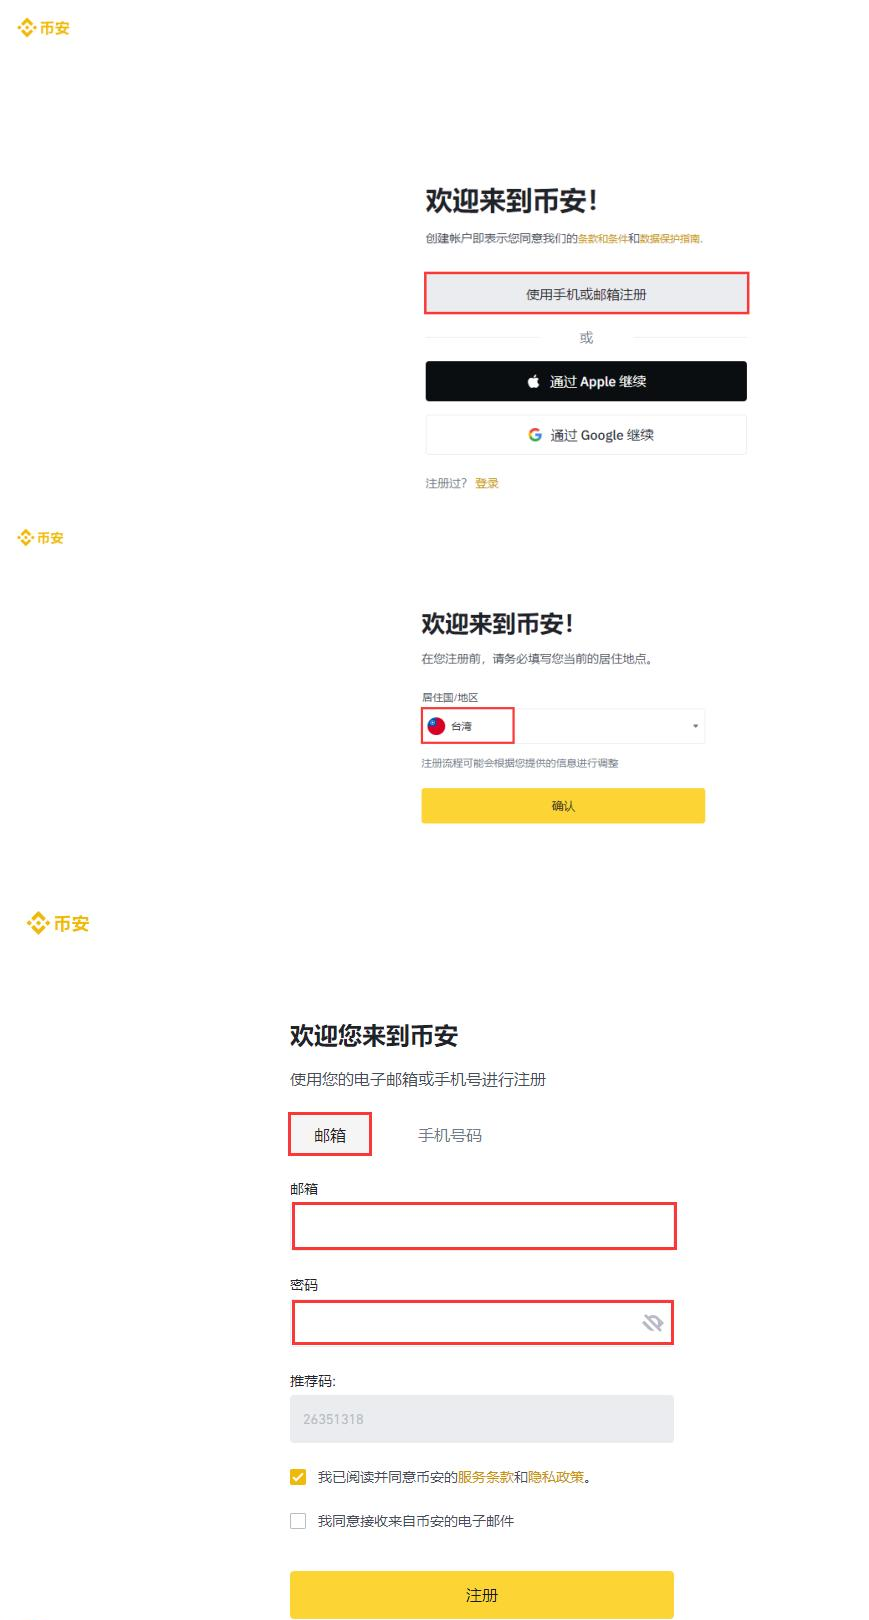
Step 1: Visit the official website and complete account registration.
First, open the official Binance website. On the registration page, select [Register with mobile phone number or email address] according to the system prompts. Select the appropriate country or region (such as Taiwan) in the region options, and then enter the [Email Registration] page (it is recommended to use mainstream email addresses such as Netease 163, QQ Email or Sohu Email). Fill in your common email address and security password in turn, click the [Register] button to submit after confirming that there is no error.
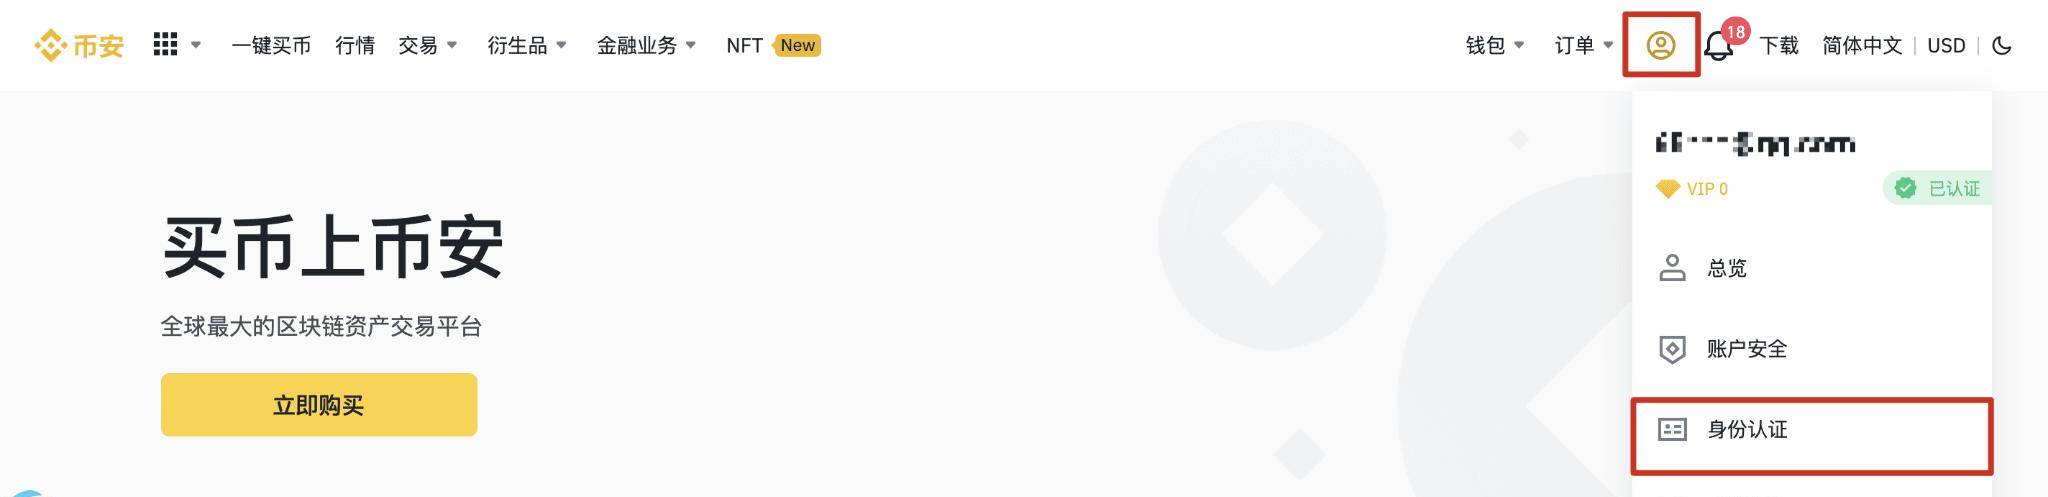
Step 2: After completing the successful registration of the KYC identity authentication
account, real-name authentication must be performed in order to ensure account security and obtain transaction rights. Please go to the [User Center], find and click the [Identity Authentication] option. On this page, you can see the transaction limits corresponding to different certification levels. It is recommended to follow the system guidelines and gradually complete the submission of various materials to improve your account security level and available transaction limit.
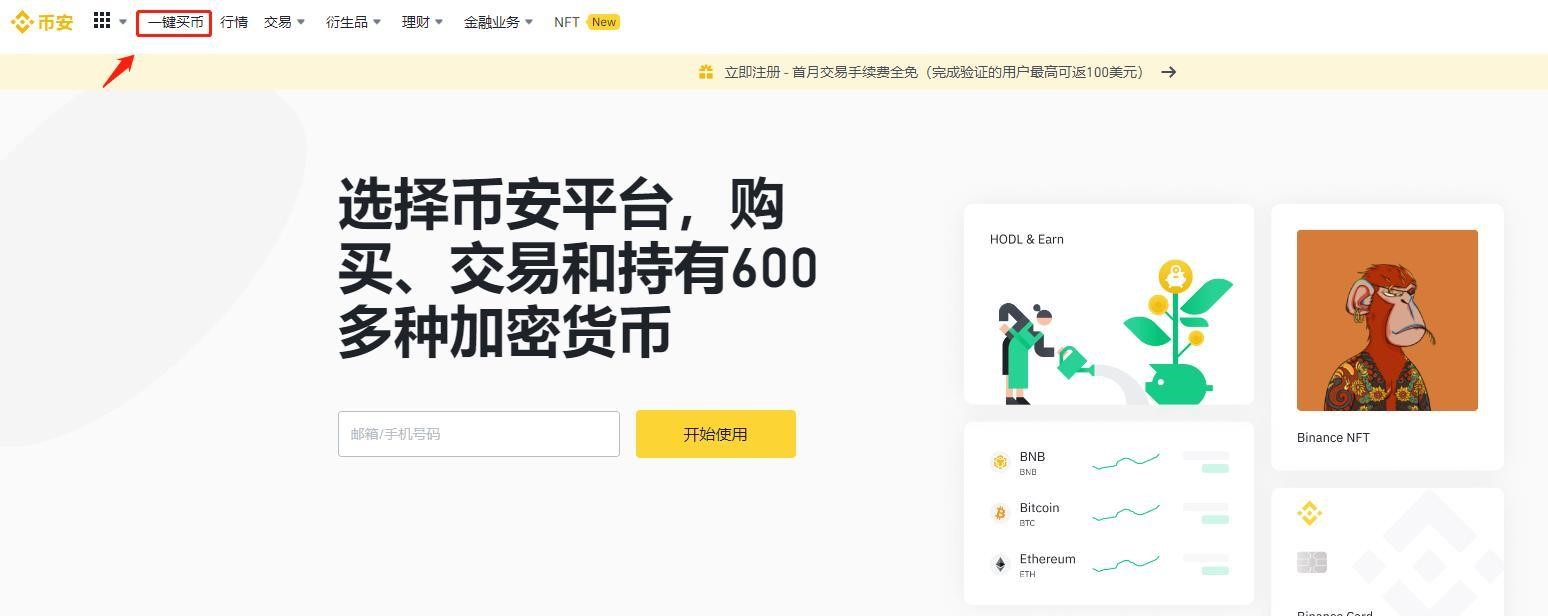
Step 3: Enter the fast coin buying channel.
After your identity authentication passes the review, return to the Binance home page, find and click [One-Click Buy Coin](or Quick Buy Coin) in the top navigation bar, and enter the legal currency trading section.
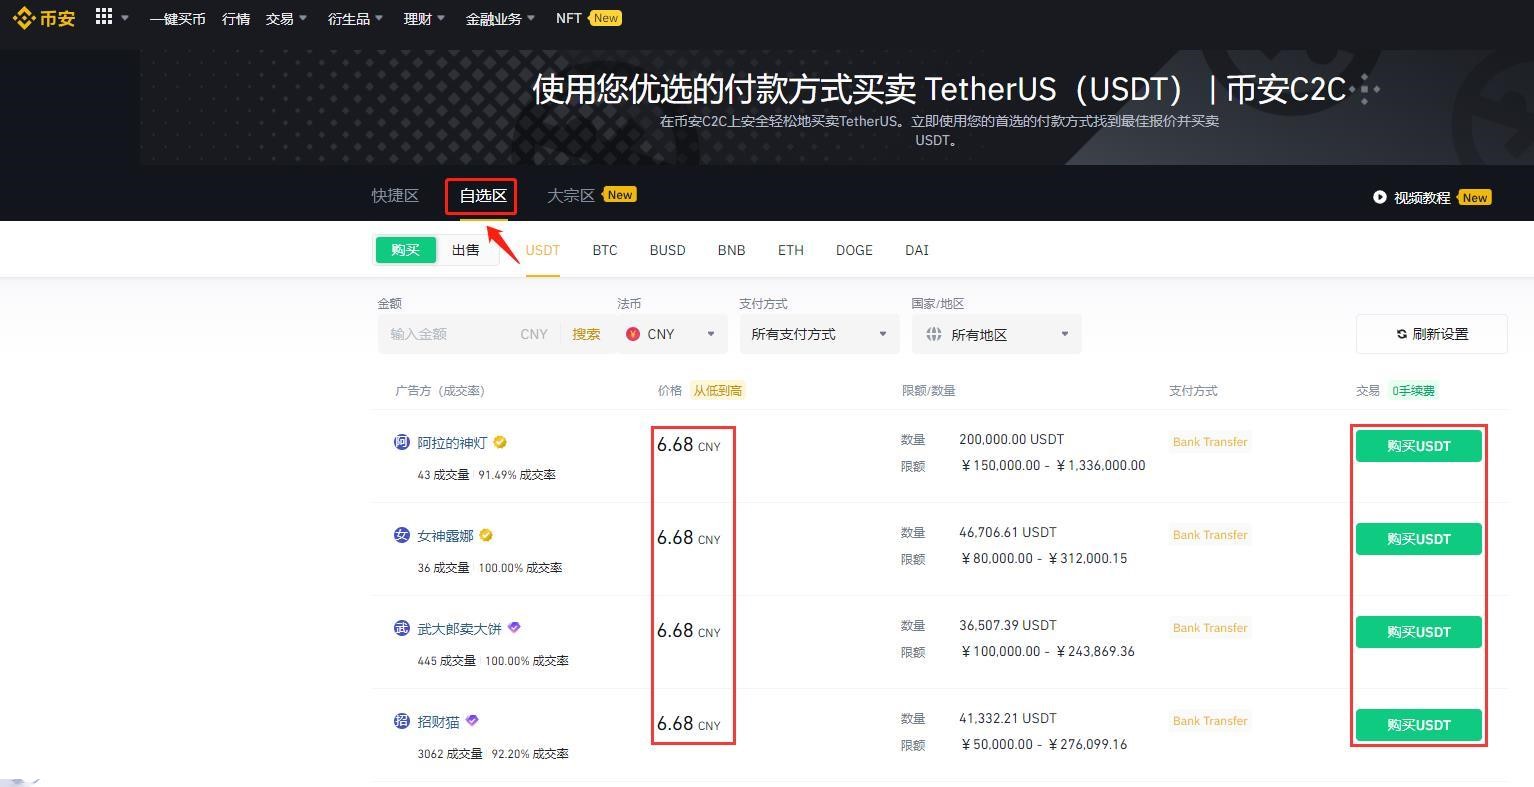
Step 4: Buy Basic Tokens (USDT) through the optional area
. On the coin purchase page, switch to the [optional area](C2C transaction). Here you can browse the quotations of multiple merchants and select the most suitable seller based on your own capital size and payment method. Click [Buy USDT] and follow the collection information displayed in the system pop-up window to complete the transfer to the seller offline. After the payment is completed, be sure to click "I have paid, notify the seller", and then just wait for the seller to confirm the payment and release the USDT to your account.
Step 5: Transfer and start spot trading.
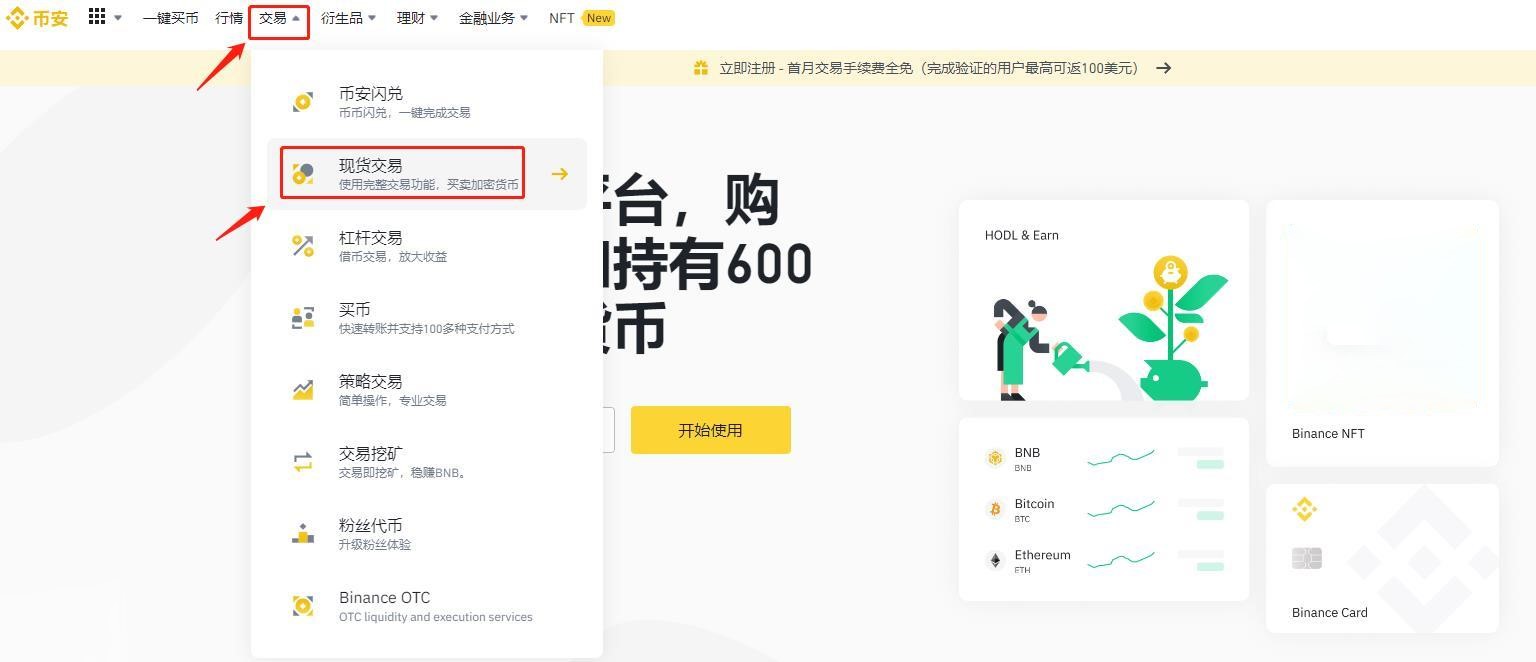
After your account successfully receives the USDT, you can start trading various digital assets. Click [Trading] on the menu bar at the top of the page, and then select [Spot Trading] from the drop-down menu to enter the professional K-chart and trading terminal page.
Step 6: Search and select the target trading pair
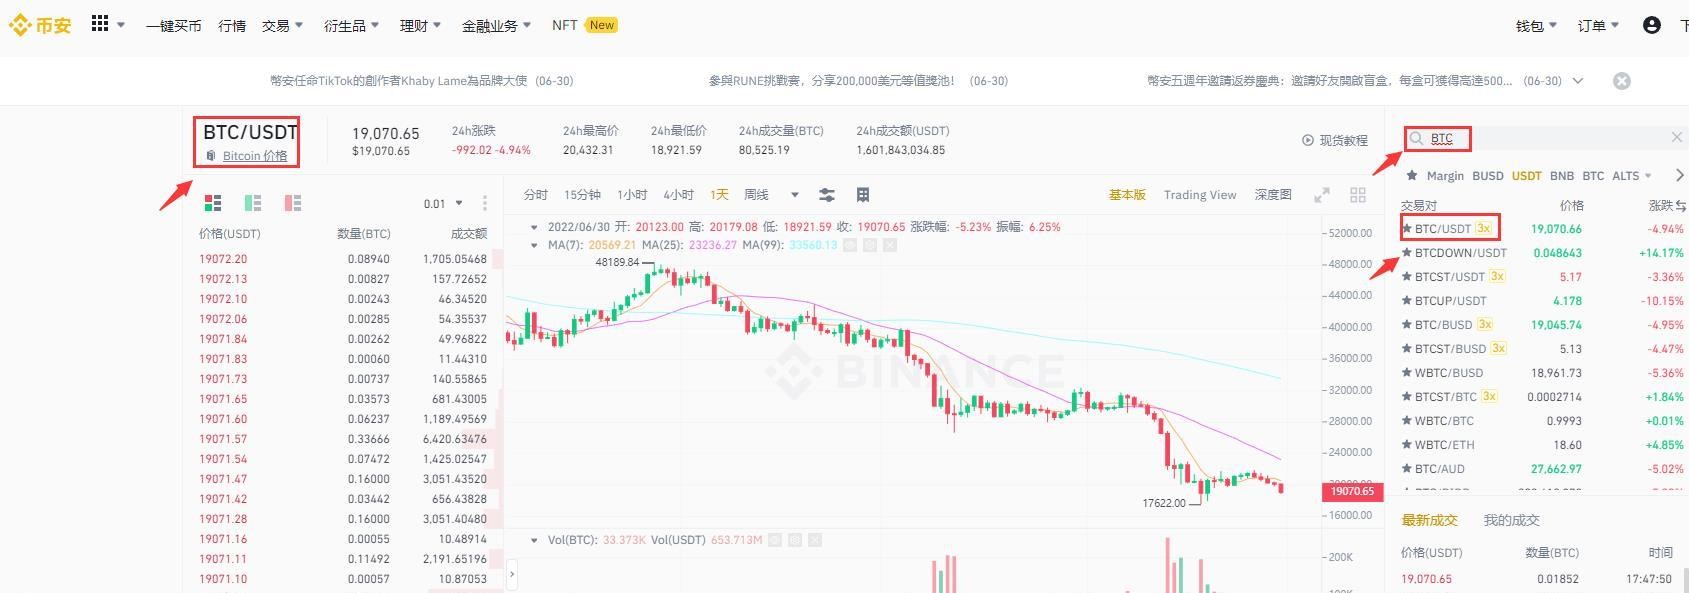
On the right side of the spot trading interface, there is a search box. If you want to buy Bitcoin, just enter the English abbreviation of Bitcoin "BTC" here, and then select the "BTC/USDT" transaction pair from the list that pops up below.
Step 7: Perform the buying and selling operation
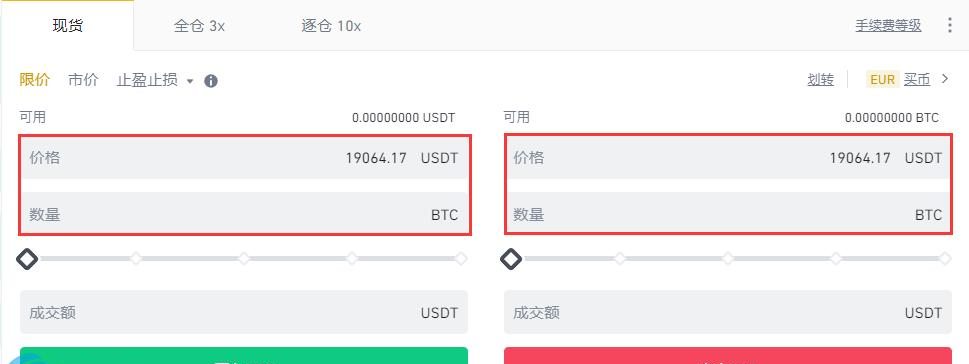
Finally, in the trading panel at the bottom of the page, enter the price and quantity of BTC you want to purchase, and click [Buy BTC] to complete the pending order; Similarly, when you need to sell the assets in your hand to realize, just enter the corresponding quantity in the sell panel on the right and click [Sell BTC].
Tips: Although this tutorial uses purchasing Bitcoin (BTC) as a demonstration case, this transaction logic is applicable to the vast majority of cryptocurrencies on the Binanping Platform. If you want to invest in other currencies, just replace it with the abbreviation of the currency you want to buy (such as ETH, BNB, etc.) in the search box in step 6.